
Buy balloons on Amazon (paid link):
Buy an air pump on Amazon (paid link):
Inflate sixteen balloons leaving about 8 cm flat tails (pic 1 and 2).


I am going to use the same weaving technique as in previously published instruction "Balloon candy cane". Tie nozzles of two balloons (pic 3).

Twist the one about 3 - 4 cm bubble (pic 4).

Lock both ends of this bubble in one lock twist (pic 5). It is an additional bubble to hide the knot of the first pair of balloons.

Tie nozzles of the second pair of balloons. Place the second pair of balloons between the first pair (pic 6).

We are going to work both balloons of each pair at the same time, twisting and locking bubbles in one move. To make the straight line we are going to twist all bubbles of the same about 12 cm size. Twist and lock the first bubbles of the first pair of balloons (pic 7).

Twist and lock the first bubbles of the second pair of balloons (pic 8).

Work in this way to make the first six bubbles of each pair of balloons (pic 9).

From here we have to make the curve. To make the curve we have to twist smaller size bubbles of the inner row of the first pair of balloons. I make this bubbles about 8 cm long - keep in mind that I always give very approximately estimated size of all bubbles - use your own judgment (pic 10)! All other bubbles we twist of the same size as previously.

Work in this fashion to make as many bubbles as you can and then add new pairs of balloons. In this example I have to add new pair of balloons after I made the eighth bubbles of the first pair of balloons (pic 11 and 12).


Cut off the rest parts of the first pair of balloons and tie off the ends (pic 13).

Make the eighth bubbles of the second pair of balloons (pic 14).

Attach a new pair of balloons (pic 15).

Cut off the rest parts of the second pair of balloons and tie off the ends (pic 16).

Keep working in this fashion to make the semicircle. In this example I have to make six smaller size bubbles of the first/third pair of balloons to make the semicircle. I marked those bubbles with letter S on the picture 17.

From here we have to make a couple more regular size bubbles of each pair of balloons. We have made half of the heart (pic 18).

Now we have to make the second half of the heart. Pull nozzle of the new balloon through the loop of the first bubbles of the first pair of balloons (pic 19 and 20).


Take another balloon. Tie nozzles of both balloons in one knot (pic 21).

We have attached a first pair of balloons of the second half of the hart (pic 22 and 23). Hide the knot between bubbles of the sculpture.


Take another pair of balloons and place it between the first pair (pic 24 and 25).


We are going to work the second half of the heart in the same fashion as we did the first half, making bubbles of the same sizes (pic 26 and 27).


However, there is one important difference! We attached the second half of the heart to the first bubbles of the first half of the heart. This pair of bubbles become a link between both half of the heart. Therefore, we have to start making smaller bubbles for the curve after we make the first five bubbles of the inner row (pic 28 and 29).


After you make the semicircle with sixth smaller size bubbles you have to make the same number of regular size bubbles as you did for the first half of the heart (pic 30).

You can stop here and attach appropriate ends of balloons of both halves to make the heart shape. Or you can add some more bubbles to make the heart wide (pic 31).

Make sure you attaching appropriate ends of balloons before you cut off the rest parts of balloons! Cut off the rest part of balloons of one pair of balloons and tie off the ends on one side of the sculpture (pic 32)

Double check if you attaching to the appropriate pair of balloons on the other side of sculpture (pic 33 and 34).


Hold balloon of the outer row of one (right in this example) side of the sculpture between balloons of the other (left) side of the sculpture (pic 35 and 36).


Make the last pair of bubbles of the left side of the sculpture (pic 37).

Cut of the rest parts of the balloons on the left side of the sculpture and tie off the ends (pic 38).

Twist the last pair of bubbles on the right side of the sculpture (pic 39 and 40). In this example I have made total of 15 bubbles on each side of the sculpture in each row. Twist one additional about 3 - 4 cm bubble and lock both ends of this bubble in one lock twist. This is additional bubble to hide the knot on the top of the sculpture.


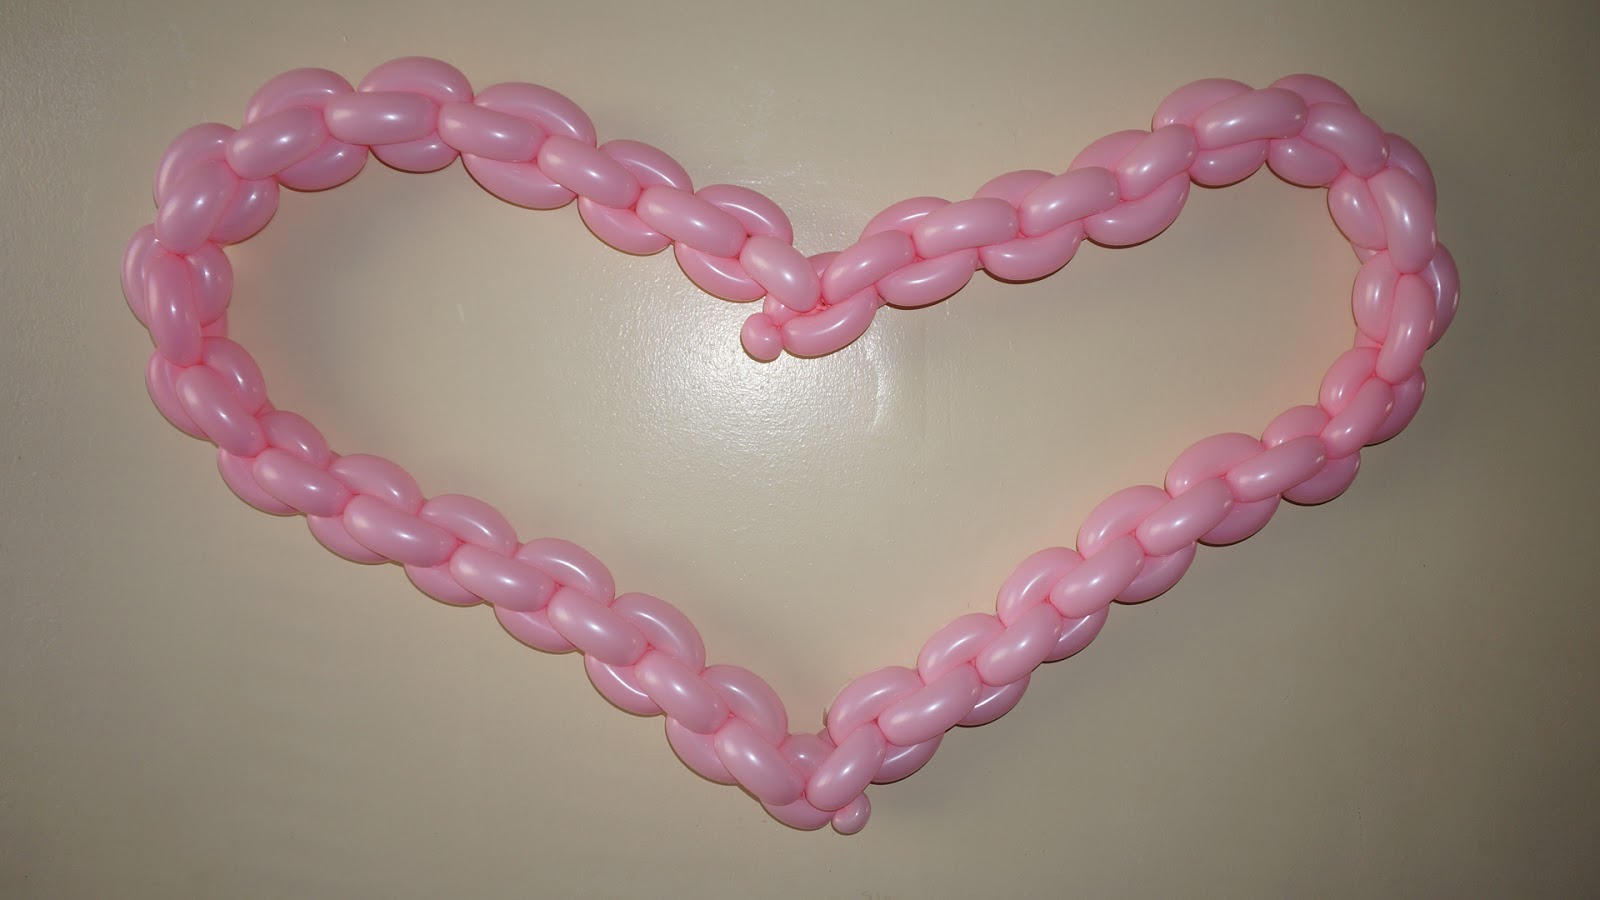
Cut off the rest of the balloons and tie off the ends. Hide the knot under the small additional bubble. Congratulations! You have made balloon heart (pic 41 and 42).


I use clear sticky tape and sewing thread to attach the sculpture to a wall (pic 43 and 44). It is relatively large size sculpture. You can make even larger size heart working in the same fashion as described in this instruction. Each half of the sculpture can be used as stand alone balloon arches. There also many other applications for this balloon twisting technique. As always when you make large size balloon sculptures it is better to work in a team or with some assistant - any person can help to hold one end of the sculpture (it will prevent popping bubbles!). Always keep some spare balloons to repair the sculpture - balloons tend to pop regardless of your balloon twisting skills! Have fun and happy twisting :)

This comment has been removed by the author.
ReplyDeleteHi… This blog sounds great. Overall is excellent. I love this. But need to improve to explain in deep and listing the factors specifically. But still it’s awesome and knowledgeable. Nice work. Magician For Hire
ReplyDelete