Buy balloons on Amazon (paid link):
Buy an air pump on Amazon (paid link):
We have to inflate the balloon starting from the opposite end. To make it happened we stretch the opposite end of the balloon. Then we inflate the balloon. The balloon inflates starting from the spot we stretched, if the temperature in your apartment is about 90. Otherwise you have to force the air from the nozzle to the opposite end of the balloon. Then inflate the rest of the balloon. Make sure to leave about four—inch flat tail at the nozzle side of the balloon (Pic 1).
The first bubble we are going to twist is to make the nose. I don’t want a knot on the nose. It is the reason we inflated balloon in such way. So, starting from opposite to the nozzle end of the balloon we twist the first three (or four) inch bubble (Pic 2).
The next bubble we twist to make the ear. Twist the third soft about one inch bubble (Pic 4). You can twist larger size bubble if you like to make bigger ears :)
Twist the fourth about four inch bubble (Pic 6). We can make the fourth, the sixth and the seventh bubble soft or firm, it’s all up to you. Would it make a difference? Yes. Soft bubble bends easier. It would make the head or part of the head more round shape.
The next bubble we twist to make the second ear. Twist the fifth soft about one inch bubble (Pic 7).
Lock both ends of the chain of the last three (the fourth through the sixth) bubbles in one lock twist (Pic 10).
Lock both ends of the chain of the last two (the sixth and the seventh) bubble in one lock twist (Pic 12).
Lock both ends of the chain of the last seven (the second through the eighth) bubbles in one lock twist (Pic 14 through 16).
The next bubble we twist to make the second nose. We can twist it of any size. We can make it small and nice. But I want to make it big and ugly. Twist the ninth about seven—inch bubble (Pic 17).
Lock both ends of the ninth bubble in one lock twist (Pic 18 and 19). We have made the second nose. The rest of the balloon is the tenth bubble. It is the neck.
Now we fix the first nose in proper position. Force the first bubble in the loop between the sixth and the seventh bubbles (Pic 20).
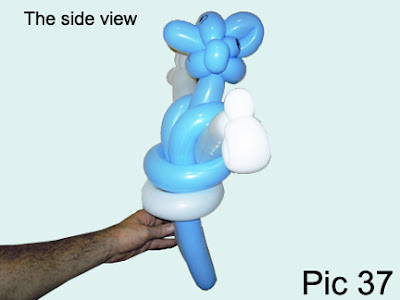
Now we fix the neck. Force the tenth bubble in the loop between the fourth and the sixth bubble. Fix all bubbles in proper positions (Pic 21 through 28).


No comments:
Post a Comment