Buy balloons on Amazon (paid link):
Buy an air pump on Amazon (paid link):
Inflate a purple balloon leaving about 2 - 3 cm flat tail (Pic 1). I am going to use this balloon to make a basic three fold hat with two eye bubbles.
Wrap the balloon around your head to measure the size. Twist the first bubble half size of your head (Pic 2).
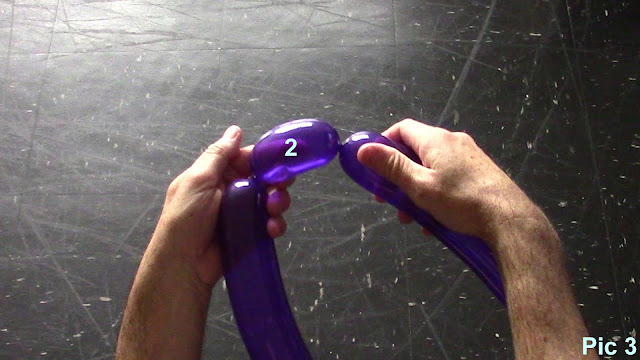
Twist the second soft about 7 - 8 cm bubble (Pic 3).
Lock both ends of the second bubble in one lock twist (Pic 4).
Twist the third soft about 7 - 8 cm bubble. Make sure the second and the third bubbles of the same size! Lock both ends of the third bubble in one lock twist (Pic 5). We have made the eye bubbles.
Twist the fourth bubble of the same size as the first bubble. Lock both ends of the chain of the first four (the first through the fourth) bubbles in one lock twist (Pic 6).
The rest of the balloon is the fifth bubble - it should be about the same size as the first bubble. We have to lock the free end of the fifth bubble between the eye bubbles. For my convenience, I twist the sixth small (about thumb nail size) bubble at the end of the balloon (Pic 7).
Lock the free end of the fifth bubble between the second and the third bubbles (Pic 8-11). We have made the base of the hat with two eye bubbles. If the fifth bubble is visibly longer than the first bubble, then you can twist larger size sixth bubble. And then you can use the larger sixth bubble to represent the mouth of the bug.
Inflate two orange balloons leaving about 17-18 cm flat tails. The inflated part of each orange balloon should be about 5 cm longer than the first purple bubble (Pic 12-13).
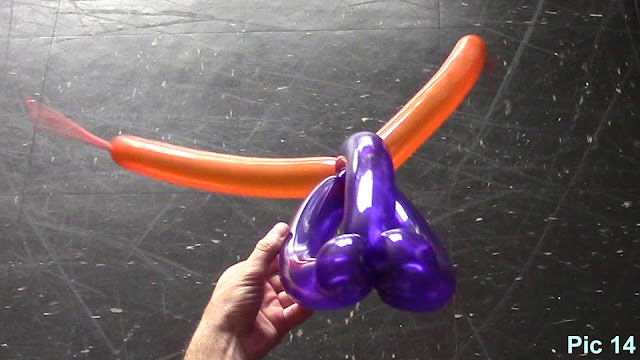
Tie nozzles of both orange balloons to the back of the hat between purple bubbles (Pic 14).
Twist the second orange about 3 cm bubble at the end of the balloon. Lock the free end of the first orange bubble between the purple eye bubbles. Work both orange balloons in the same way making corresponding bubbles of the same size (Pic 15).
Basically we already made the balloon bug hat (Pic 16). The flat ends of the orange balloons represents antennas of the bug.
We can make the antennas funnier. Force each second orange bubble to the end of the orange balloon (Pic 17). Congratulations! You have made the balloon bug hat. In this example we put together simple three fold hat and simple two balloon bug hat to make more complicated balloon sculpture.
We can make many variations of this kind of balloon hats by using different color balloons and/ or making additional bubbles. For example we can use black and red balloons to make a ladybug balloon hat. Though, I think for the Halloween it would be even more fun to use Halloween color balloons to make all kind of blood suckers (Pic 18).
Below you will find closer pictures of the bug hat that we just made together (Pic 19 - 25). I use white correction liquid to draw the eyes. I draw black spots on the orange balloon using permanent black marker. This hat is suitable for medium or small size head be course I use one purple balloon to make the base of the hat and the two eye bubbles. To make large size hats you have to use one balloon to make the base of the hat and different balloon to make the eye bubbles.
In the following example I used red and purple balloons to make the bug hat. Also, I added small red bubble to represent the mouth of the bug (Pic 26 - 33).
In the following example I made vampire ladybug hat using one purple balloon for the base and the mouth, one red balloon for the top of the hat, one white balloon for the eye bubbles, and one yellow balloon for the antennas (Pic 33 - 39). I like this blood sucker for Halloween :)
Have fun and happy twisting :)


No comments:
Post a Comment